git add .
git commit -m "descriptive message"
git push

# next time you pick up work
git pullRStudio Projects and Version Control: Working Without Getting Lost in Files
Working with loose files and duplicated versions leads to confusion, especially in collaborative projects. This post introduces the use of RStudio projects combined with version control in GitHub and proposes a more organized and reproducible workflow.
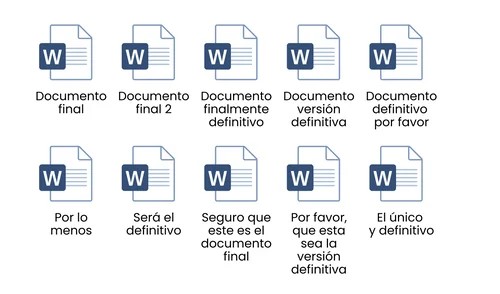
Those who start working with data usually do so with loose files. A script called final_analysis.R, then another final_analysis_v2.R, then real_final_analysis.R. As work progresses, copies appear on different devices, versions sent by email, and duplicated folders. If several people are also involved, the situation quickly becomes confusing: it’s not clear which is the most updated file, what changes each person made, or which version was used to obtain a result.
A common response to this problem is to move everything to the cloud. Services like Google Drive or Dropbox allow files to be available from different locations and devices. This solves part of the problem, because it reduces the circulation of disconnected copies. However, an important question remains open: how to record changes over time, go back if something goes wrong, or understand what was modified between one version and another of the same file.
That’s where version control comes in, and particularly platforms like GitHub1. Version control allows you to save the history of a project, record each change in an organized way, and work collaboratively without stepping on each other’s work. GitHub adds a cloud infrastructure that facilitates sharing projects, collaborating, and maintaining a clear reference of which version is current. Instead of exchanging finished files, you work on the same project, with an explicit record of its evolution.
In short, the way Git works is as follows: we have a repository (we can think of it as a folder hosted in the cloud) from which we download a copy to our computer. We make changes to that repository, but as long as we don’t do anything else, the version in the cloud (on GitHub) will remain as it was before. Once we finish working or reach a satisfactory result, we “upload” those changes to that repository and the one in the cloud is updated (and both the repository in the cloud and the one we have on our computer will be identical).
Different people can work with the same repository and “upload” their changes, as long as those changes do not conflict. When this happens (and it will happen, comrades, inevitably), Git allows us to know where that conflict occurs, which versions conflicted (“up to version 4 everything was fine, in Pepito’s version 5 everything went wrong”) and gives us the possibility to revert changes to a previous version (or forcibly accept the changes). The good thing is that Git keeps a record of everything, which can get us out of trouble more than once.
Create an RStudio project connected to GitHub
RStudio already includes a functionality that allows integrating our projects with a GitHub repository. To combine RStudio with version control, the starting point is still an RStudio project. The difference is that this project will be associated with a repository from the beginning.
- Create a GitHub repository Log in to your GitHub account and create a new repository by clicking the green button in the top right, New.

Choose a simple name and check the option to initialize it with a README.md file. Copy the repository URL, which we will use in the next step.
Create the project from RStudio In RStudio, go to File > New Project. Choose the Version Control option and then Git. Paste the GitHub repository URL and select the local folder where you want the project to be downloaded. Upon accepting, RStudio creates a folder that already includes the link to the repository.
Recognize the working environment Once the project is created, you will notice a new panel in RStudio called Git. From there, you can view modified files, save changes, and send them to the remote repository. From this moment on, all work should be done within this project folder.
Save and record changes Here you have two different ways to upload changes: one is through the graphical interface integrated into RStudio and the other is through the terminal also integrated into RStudio. For the first method, you need to identify the tab that says “Git”, next to “Environment” and “History”. When you edit a script or add a file, RStudio marks those changes in the Git panel. To upload them to the repository, you select the files in the Staged column, click the Commit button (here you write a brief message describing what you did), and confirm the change. That record is saved as part of the project history. Finally, you click Push and the files are uploaded. The next time you start working, you need to do a “Pull” to ensure you download all changes that other people (or you on another device) have made to your local repository.
The second way is through the terminal, which is next to the “Console” tab. The logic is the same: you select the files, add a descriptive message indicating what you did (the commit), and then upload them. The difference is that you do it with commands:
Each time you type a command, you press enter to execute it. In my experience, it’s faster and simpler than using the RStudio graphical interface, but it’s a matter of taste.
This workflow allows for more organized and transparent work. Every decision is recorded, errors can be reverted, and the project becomes a shared space with memory.
Working with projects and version control is not just a technical matter. It is a way to organize intellectual work, to make it more readable, and to reduce friction when collaborating with others. We must warn you that, as Uncle Ben said, with great power comes great responsibility, and it’s normal to encounter errors when using Git (especially if we use several devices and forget to update changes). There are many commands for thousands of situations and tight spots you might find yourself in, so I suggest having guides like this one or even this FreeCodeCamp course handy.
Footnotes
While we will talk about GitHub here, strictly speaking, one thing is Git and another is GitHub. Git is the version control system that is installed locally and is responsible for recording changes in files, something like the technology that allows tracking changes. GitHub, GitLab, and similar platforms are services that host Git repositories in the cloud and add tools for sharing, collaborating, and managing projects.↩︎